Food


Peaches were on sale the other day. I couldn’t resist bringing some home!

bowll of peaches

Can’t you just almost smell them?

fresh peaches

Truth be known, I’m not that big of a peach fan. Sorry. I’ve always wanted to like peaches. I don’t just HATE them, but they are not my first choice. However, there are other people who live in this house who LOVE peaches. So, I bought them.

I didn’t really have a plan for the peaches when I bought them. I thought the kids might munch on them. Then I thought about making something like peach cobbler. Finally, I decided to go with Peach Melbas.

A Peach Melba is basically peaches, vanilla ice cream and raspberry sauce/jam. Wouldn’t you know it–we were out of raspberry jam! Hrumph! So, we substituted strawberry jam. It was tasty but not as tasty as raspberry.

The first order of business was to peel the peaches.

Here is a simple method for removing the skin while keeping the fruit.

First, bring a pot of water to a simmer on the stove. How much water? You only need  just enough water to cover the peaches.

pan of simmering water

While you are waiting for the water to simmer, score the fruit. Just a simple “X” will do.

score the fruit

Into the water with the peaches. Be careful, you don’t want to bruise them.

add peach to boiling water

It doesn’t take long for the skin to start to let go of the fruit. When you see it starting to happen, go ahead and remove the peaches.

loosening skin

Like magic, the skin is easy to remove.

peeling peaches

You can see how my thumb is starting to push the skin off effortlessly.

removing peach skin

Cut up the peaches however you like–halves, slices, bite-sized pieces. We chose the latter.

Place the peaches in a serving dish. Top with a big scoop of good vanilla ice cream.

Our ice cream of choice…

ice cream

Heat your raspberry jam in the microwave or on the stove. Drizzle the jam over the peaches and ice cream.

Peach Melba

I’m sure you can get all fancy and make an actual raspberry sauce. We were going for easy and yummy!

Even with the strawberry jam, it was a fabulous summertime treat!

Critics’ Corner

Chip: Peach, good. Ice cream, good. Jam, GOOD!

Megan: Words cannot describe the deliciousness. It might just be the sugar rush at 9:00! (Yes, I gave my kids Peach Melbas at 9:00 PM.)

Katie: This is by far the best, y’all. (Katie had us all rollin’ in the floor laughing at her Paula Deen impressions! Granted, we do say “y’all” at our house.)

Ice Cream Time

What is your favorite flavor?

These Tea Bag Cookies were really easy to make.

To refresh your memory, here is the picture of the tea party dessert plate.

dessert plate 1

You could use a shortbread cookie dough, but I just used a plain old sugar cookie dough.

actual size

I rolled the dough out on parchment paper to make moving the cookies easier.

Then, I cut each cookie the size of actual tea bags!

quilt ruler

I used my quilting ruler to measure the cookies. It really works great in the kitchen! The ruler has inches, half inches, etc. marked. Being able to see through the ruler sure helped getting the cookies to be a uniform size.

After cutting a rectangle, I just nipped off the corners to resemble a tea bag.

cutting tea bags

Since my cookie wasn’t going to be folded over and stapled like a tea bag, I used a straw to make holes in the tops of the cookies.

tea bag cookies

I made the cookies way in advance and put them in the freezer, since I was making so many of them. When it was time for the party, I added the chocolate. I just melted chocolate chips with a little shortening.

chocolate dipped tea bag cookies

They were as yummy as they were cute! Everyone loved them.

The adorable teapot tags came from here.

The second course at our lovely tea party was scones. If you follow this blog regularly, you might remember me testing out the scones recipe. (click here)

They turned out great!

scones with clotted cream and jam

scones plate 1

I used Martha Stewart’s recipe for Blueberry-Buttermilk Scones. I just left out the blueberries. This was the only recipe I tested. It was so yummy, I figured, why bother with another one? It was simple enough, too.

First, mix all your dry ingredients together.

Then you are going to cut in your butter. (Cold ingredients will be best.) The butter needs to be cut into small pieces. That is how you get even distribution of butter.

butter, small pieces

cutting butter

I have read that if you don’t have a pastry cutter you can use two knives to cut in the butter. Personally, I have never liked that method. You can pick up a cutter fairly inexpensively.

Next, whisk together your wet ingredients and drizzle over the dry-stirring as you go.

add wet ingredients

After you dough comes together, turn it out on a floured surface. Gently knead a couple of times to incorporate all the flour. Pat it into a 1 inch disk.

pastry disk

Cut into 8-12 wedges, depending on the size you would like. I went with 12 on my trial run. After tasting how yummy they were I decided to make them a little larger for the tea party.

cut in eighths

Transfer the wedges to your parchment-lined baking sheet. (The batch pictured was waiting its turn on the pan.That’s why it is on a cutting board.)

bake on parchment paper

Here you will brush each scone with a beaten egg and sprinkle with sugar.

brush with egg wash

sprinkle with sugarI can’t believe I was able to sprinkle sugar while I took the picture!

spilled sugarOkay, maybe not!

Bake ’em up at 375˚ for about 22 minutes. My parchment paper looks kinda nasty because I reused it. I was making 13 batches of scones! Parchment paper costs money! I used each piece two or three times. I scraped the crusty parts off before reusing it each time. Cool the scones on wire racks.

on parchment paper

scones cooling on wire rack

When they are completely cool, you can freeze them. Of course they are best straight from the oven!

I made lots of scones!

lots of scones

pile of scones

scones pile

Ingredients

  • 1 1/2 cups all-purpose flour
  • 1/2 cup cake flour, (not self-rising)
  • 3 tablespoons granulated sugar
  • 2 1/2 teaspoons baking powder
  • 3/4 teaspoon salt
  • 4 ounces (1 stick) cold unsalted butter, cut into small pieces
  • 1 cup (1/2 pint) blueberries
  • 1/2 cup low-fat buttermilk
  • 1 large egg, plus 1 large egg lightly beaten for egg wash
  • 1/2 teaspoon pure vanilla extract
  • Fine sanding sugar, for sprinkling

Directions

  1. Preheat oven to 375 degrees. Line a baking sheet with parchment paper.
  2. Whisk together flours, granulated sugar, baking powder, and salt in a large bowl. Cut in butter with a pastry cutter, or rub in with your fingers, until mixture has the texture of coarse meal. Stir in blueberries.
  3. Whisk together buttermilk, 1 egg, and the vanilla. Drizzle over flour mixture, and stir lightly with a fork until dough comes together but a small amount of flour remains in bowl.
  4. Turn out dough onto a work surface, and gently knead dough once or twice just to incorporate flour. Pat dough into a 1-inch-thick round. Cut into 12 wedges. Transfer to prepared baking sheet. Brush with egg wash, and sprinkle with sanding sugar. Bake until golden brown and cooked through, about 22 minutes. Transfer scones to wire racks to cool.

Cook’s Note

Scones are best served immediately but can be frozen for up to 1 month. Thaw, and reheat in a 350-degree oven for 10 minutes.

The scones were served with “Mock Clotted Cream”. I found the recipe here.

Mock Clotted Cream Recipe


Ingredients:

1 cup heavy whipping cream
1/3 cup light sour cream
2 tablespoons powdered (confectioners’) sugar, sifted


Preparation:

Using a whisk attachment on your mixer, whip cream until stiff peaks form.

Using a large spoon or rubber spatula, fold in the sour cream and powdered sugar just until combined.

Refrigerate, covered, until ready to serve.

Make approximately 2 cups or enough to serve 6 to 8.

Don’t know about clotted cream? What’s Cooking America also had this little tidbit of information:

Question:

Could you tell me what the difference is between clotted cream and creme fraiche?  It doesn’t sound like there is much difference, other than country of origin. Thanks – Jim Buffy (12/29/03)

Answers:

clotted cream – Traditionally served with tea and scones in England; it is a 55% minimum milk fat product made by heating unpasteurized milk to about 82 degrees C., holding them at this temperature for about an hour and then skimming off the yellow wrinkled cream crust that forms (until the cream separates and floats to the surface). It is also known as Devonshire cream. It will last up to four days if refrigerated in a tightly sealed container.

Devonshire cream (DEHV-uhn-sheer) – Originally from Devonshire County, England, it is a thick, buttery cream often used as a topping for desserts. It is still a specialty of Devon, Cornwall, and Somerset, as this is where the right breed of cattle is raised with a high enough cream content to produce clotted cream. It is also known as Devon cream and clotted cream. Clotted cream has a consistency similar to soft butter. Before the days of pasteurization, the milk from the cows was left to stand for several hours so that the cream would rise to the top. Then this cream was skimmed and put into big pans. The pans were then floated in trays of constantly boiling water in a process known as scalding. The cream would then become much thicker and develop a golden crust, which is similar to butter. Today however, the cream is extracted by a separator, which extracts the cream as it is pumped from the dairy to the holding tank. The separator is a type of centrifuge, which extracts the surplus cream at the correct quantity so that the milk will still have enough cream to be classified as milk.

creme fraiche (krem FRESH) – It is a matured, thickened cream that has a slightly tangy, nutty flavor and velvety rich texture. The thickness can range from that of commercial sour cream to almost as solid as room temperature margarine. In France, the cream is unpasteurized and therefore contains the bacteria necessary to thicken it naturally. In America, where all commercial cream is pasteurized, the fermenting agents necessary can be obtained by adding buttermilk or sour cream. To make creme fraiche, combine 1 cup whipping cream and 2 tablespoons buttermilk in a glass container. Cover and let stand at room temperature from 8 to 24 hours, or until very thick. Stir well before covering and refrigerate up to 10 days. It is an ideal addition for sauces or soups because it can be boiled without curdling. It is also delicious spooned over fresh fruit or other desserts such as warm cobblers or puddings.

Now you see why I went with the Mock Clotted Cream! It is not real sweet, so it is perfect with a dollop of jam!

Since I had made the scones in advance and stuck them in the freezer, they needed to be warmed a little before serving. (After thawing, of course.) I was a little nervous about how they would turn out reheated.

Scones

Not a problem! They were excellent! You do, however, lose some of the texture of the sugar sprinkled on top. I think I’m the only one who knew the difference. Well, NOW they know.

scones plate 2

We had strawberry jam with our scones. Mmmmmm!

When the Tea Party was over, we had some of the clotted cream left. My family enjoyed it with French Toast and fresh strawberries.

French toast with strawberries and cream

French Toast with strawberries and cream 1

The scones were easy and tasty. There are so many flavors out there to try–Orange Cranberry, Nutella, Pumpkin, Maple. Oh, yeah! I’ll be trying some of those!

Have you made scones? Do you buy scones? Do you have a favorite flavor?

Is all of this new to you? Are you going to give it a try?

I’m not sure if I have told y’all or not, but I’m in charge of a tea.

Okay, I’m not in charge of the whole thing, just the food. If you follow me on Pinterest you may have seen my Tea Party board.

The group I sing with, Top of the Rock Chorus, is having a fundraiser tea.

This morning I tested out two recipes–scones and clotted cream.

Oooo-la-la!

I wanted to eat the whole batch!

Today I only have pictures for you. I’ll have a GRAND post after the tea is over and done with.

Tea Time with Pork Chop Tuesday

Scones with clotted cream | Pork Chop Tuesday

tea on vintage linens | Pork Chop Tuesday

Scones | Pork Chop Tuesday

As you know, I have been trying to cut calories lately. That means a lot of my “go-to” recipes are out the window, at least for now.

I hit good old Pinterest to find some low-cal options. I found a few to try.

I really have been cooking lately. I just have not quite been in “blogger” mode.

Quite frankly, it has made dinner a little easier. Stopping to take photos at every step does kinda slow you down.

So, here are some of the recipes we have tried recently with only a screen shot of the recipe from my Pinterest page!

Please visit the links provided under the picture to see the original post by the original blogger. You might consider following me on Pinterest, too!

Veggie Soup

Cheesy Vegetable Chowder from Lulu the Baker

I liked this recipe. It was cheesy enough to be yummy, yet I felt like I was eating a healthy meal.

Serves 8

219 calories per serving

Critics’ Corner

Chip: I don’t normally like veggies in my cheese, but this time I’ll make and exception. Very good.

Megan: It was much thinner than I expected, but that turned out to be a good thing. I don’t normally like cheese in my veggies, but this time I’ll make an exception. (silly girl!)

Katie: It was really, really, really, really, really, really, really, good, good, GOOD!

Baked Chicken Parm

Baked Chicken Parmesan from Gina’s Skinny Recipes

Holy Cannoli, Batman! This was yummy! I needed to put a little more sauce between my pasta and my chicken. That’s an easy fix. This one is a keeper!

Serves 8

216 calories per serving-doesn’t include pasta

Critics’ Corner

Chip: Molto bueno (or however Italians say “That was crazy tasty”!)

Megan: Like pizza on a chicken breast.

Katie: I love me some chicken parmeeseean! : )

Mexican Shredded Beef

Mexican Shredded Beef form Skinny Ms.

This was very yummy! You can see by my Pinterest comment that I didn’t quite follow the directions. I’ll have to try it again the right way. There was a lot of juice, which made for yummy meat. It also made for drippy dinner.

Serves 6 (at least when I used the leftovers)

152 calories per serving-meat only

Critics’ Corner

Chip: Additional Mexican food recipes can only be a good thing.

Megan: This may be the only time something was too messy. The juice dripped all over my plate (and even on me) and reminded me of Chico’s Tacos.

Katie: I found it rather dee-lish-ee-ous!

Oh, yeah! I made ’em!

Okay, this information is actually from LAST Valentine’s Day, but it never got posted.

As soon as I saw this tutorial for Bacon Roses, I knew I would have to make them for my sweetie!

The tutorial is great!

Now, as I said, I made these last year, so the details are a little fuzzy.

bacon roses

I do wish I had made more!

I did not drill a hole in my muffin pan like the link suggests. Seems like I just rolled up the bacon slices and put them in my mini muffin pan. I may have stuck a toothpick through them.

I made them on Valentine’s morning–if that lets you know how easy they were.

They were a HUGE hit!

Group Therapy

My quartet helped me deliver my treat along with a song!

the happy couple

Happy Valentine’s Day!

Click here to see more of our family’s Valentine craziness.

What are you cookin’ up for your Valentine?

I’m sure you are surprised to see the next post after mentioning my diet that I am posting about Beet Cake with Orange Cream Cheese Frosting! Me too! Although I am not surprised about the cake part. The beet part is what gets me!

Since I am trying to cut calories, I pulled out some cookbooks to see what “light” recipes I could find.

Cooking Light 2002

Yeah, that cake on the front doesn’t exactly look “light” to me but whatever!

Anyway, as I perused the recipes, I came across the Beet Cake recipe. I have no idea why I stopped to read it–much less make the cake. I don’t even like beets. I remember always seeing them at Franke’s Cafeteria when I was a kid. NO THANKS!

I guess I was feeling adventuresome.

Having never eaten a beet, I sure didn’t know how to buy one.

There was a little note in my cookbook that said to buy medium globes with stems  and leaves attached, no soft spots.

beets

I knew enough about beets to know that they stain. I searched high and low in our house for a pair of rubber gloves of some sort. No luck! As I peeled and grated the beets, I held on to them with the plastic produce bag from the store. That seemed to work just fine. I found them to be rather tough. Grating them was more work than I thought it would be.

2 cups shredded

The cake was fairly easy to make.

Mix the dry ingredients.

dry ingredients

Mix the wet ingredients.

sugars and egg

Add oil.

add oil

Add the dry to the wet. Put it in a pan and put it in the oven.

For your pans, you need to line them with waxed paper.

line with waxed paper

Isn’t this the most beautiful batter you have ever seen?! I was so excited when I saw it!

pink batter

I was so disappointed when it came out of the oven and was not pink. I really expected it to stay that wonderful fuchsia color! Bummer.

remove waxed paper

While the cakes cool, mix up the frosting. It is a basic cream cheese frosting, except it has orange zest in it. WOW! That makes it super yummy!

orange zest

A few toasted walnuts on top adds to the deliciousness.

Beet Cake with Orange Cream Cheese Frosting

The recipe says to cut into 18 slices. Are you kidding me? 18? Now I see why it is in a “light” cookbook. The pieces are tiny!

slice of beet cake

I took this cake to potluck at church. Everyone loved it! It was very rich. It’s a good thing the pieces were tiny. See, that is a good way to make a cake when you are on a diet. Make it and take it somewhere. That way you get to try it without having it hang around to tempt you!

Beet Cake

Beet Cake with Orange Cream Cheese Frosting

Cake:

1 pound beets (about 2 medium )

Cooking spray

2/3 cup granulated sugar

2/3 cup packed dark brown sugar

1/2 cup vegetable oil

2 large eggs

2 1/2 cups all-purpose flour

2 teaspoons baking powder

1 teaspoon ground ginger

1 teaspoon ground cinnamon

1/2 teaspoon baking soda

1/4 teaspoon salt

1/2 cup 1% low-fat milk

  • Preheat oven to 350˚F.
  • Peel beets. Grate on the large holes of a grater-about 2 cups.
  • Coat 2 (9 inch) round pans with cooking spray. Line the bottoms of the pans with waxed paper and spray again.
  • In a mixing bowl combine flour and next five ingredients. Use a whisk to sift them together.
  • Combine white sugar, brown sugar, oil and eggs in a large bowl. Beat on medium until well blended. Add the beats, mix well.
  • Add flour mixture to the sugar mixture alternately with the milk. Start and finish with the flour.
  • Pour into prepared pans. Tap the pans on the counter one time to remove any air bubbles.
  • Bake @ 350˚ for 30 minutes or until toothpick inserted comes out clean.
  • Cool in pans 10 minutes on wire racks. Carefully remove waxed paper and cool completely.

Frosting:

2 teaspoon grated orange rind

1 teaspoon vanilla extract

1 (8 ounce) block 1/3 less fat cream cheese, chilled

3 cups sifted powdered sugar

2 Tablespoons finely chopped walnuts, toasted

  • Beat orange rind, vanilla, and cream cheese with a mixer until fluffy.
  • Add powdered sugar. Beat until blended but don’t overbeat.
  • Place one cake layer on a cake plate. Spread 1/2 cup of frosting on that layer. Top with other layer. Spread the remaining frosting on top and sides of the cake.
  • Sprinkle nuts on top of the cake.
  • Store loosely covered in the refrigerator.

Critics’ Corner

Chip: This cake can’t be “beet”.

Megan: I never thought veggies could taste so good.

Katie: It was soooooooooooooooo (take a breath)oooooooooooooo GOOD!

Just in case you were wondering about the calorie information and such, here ya go:

A serving is 1/18 of the cake.

Calories 120.7

Total Fat 2 grams

Total Carbs 25 grams

Dietary Fiber 0.3 grams

Sugars 17.9 grams

Protein 2.0 grams

Yes, the “D” word! That 4-letter word we dread after the holidays-DIET!

This is only the third time in my life I have ever “officially” been on a diet of any sort.

When I was in high school I drank the Slim Fast shakes.

Slim Fast Mix

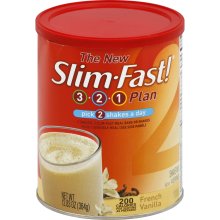
This was back before they had the pre-mixed shakes. My mom would send me the powder in a paper cup covered with plastic wrap held on by a rubber band. I would buy my milk at school and mix it there in the cafeteria. I always liked the vanilla shakes the best.

I didn’t really have a “plan” back then. I just wanted my jeans to fit better.

Isn’t that always what we want…for our jeans to fit better?

I lost weight, as best I can remember. Now don’t get the wrong idea here. I was never a “fat” kid. I have always been very average. However, based on my height and build, I should probably be on the smaller side of average.

I have always been in the proper weight category for my height–sometimes only by a pound or two.

Several years ago, when I say several, I really mean a lot, I went to on diet #2.

weight-watchersI went to Weight Watchers even before the kids came along. I was teaching at the time. If you are a teacher, you are well aware of how frequently there are snacks in the lounge! More than that, I think my weight gain at the time was from other factors. Being a “grown up” and out on my own for the first time and newly married, I think, had a lot to do with it. I was learning to cook. Really the only thing I knew how to make was Lemon Bars and French Toast. The learning curve added unwanted curves.

I was on Weight Watchers back when they had the Fat and Fiber plan. Basically, for a woman, you had to have 15-30 grams of fat per day. It seems like the minimum of fiber was 15 grams  per day. You were required, I think,  to have 5 fruits and veggies daily. You could even include juice! Like all diets, you had to drink your 8 glasses of water.

I did really great on the Fat and Fiber plan. I went to aerobics three times a week. I weighed in every Saturday morning. Chip and I would go walking. Jeans were fitting better. I think I lost close to 25 pounds. I even got a little ribbon! I don’t remember how long I was on it. I still have my little log book somewhere.

That brings us to diet #3.

bathroom scale

It seems to be fashionable to say one is making “lifestyle changes” or some fruity sounding phrase. Hooey! It’s a diet!

You know what else is Hooey??? The phrase “Nothing tastes as good as skinny feels.” Excuse me! Apparently, whoever made that up has never eaten Chicken Fried Steak with mashed potatoes and gravy or Cocoa Cola Cake or Strawberry Delight or….

Okay, I get it, we DO intend to incorporate those new eating habits forever. Skinny does feel good. I get it!

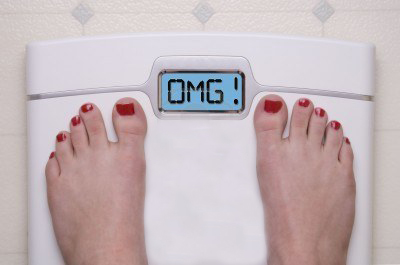
So, diet #3. You know, there is always a trigger of some sort that pushes you into that diet. Maybe you just want your jeans to fit a little better. Maybe you see a picture of yourself and gasp! Maybe you have a reunion coming up soon.

Actually, this “life change” has been a long time coming.

You know, after the kids were born, I lost the baby weight pretty quickly. The nursing for 15 months helped, I’m sure. Then the chasing of toddlers was also beneficial. Somehow, I guess I got in a rut. There was lots of late night snacking on things I didn’t want the kids to have. Wow! Super Mom!

As the kids got a little older, they were off and running, doing their own things. They didn’t really need Mom to push them in the swing any more. They wanted to SHOW Mom all they could do by themselves. So, Mom pulled up a chair and a glass of lemonade and watched from the sidelines. I guess that is where I have been for the past several years.

I am an emotional eater.

When I’m happy–I eat.

When I am stressed–I eat.

When I am bored–I eat.

I am also a grazer and a sugar-holic.

I blog about food! Hello!

The sugar thing has been on my mind for a while. I KNEW I had to do something about it. No, I didn’t get a bad doctor’s report or anything like that. I just knew.

A couple of years ago, I gave a stab a cutting back sugar. Listen to what I did…I quit adding fancy creamers to my coffee. However, I can’t stand drinking black coffee, so I added CREAM! Yeah, I’m thinking that didn’t really accomplish a lot.

When I first got my iPad, I downloaded tons of free apps. One was My Fitness Pal.

My Fitness Pal

Well, there that app sat on my iPad for a year with me never using it.

After Christmas, the only options left for my jeans was buy bigger ones or lose weight.

This time I actually TOLD my family and friends that I was going on a diet. I figured I might start to get some weird looks at the dinner table if I didn’t prep the family first.

I started using the My Fitness Pal app. All it is is a place to log your food and exercise. The app keeps up with your calories, fat grams, carbs, sugars, proteins, all that! There is also a “community” you can belong to if you choose.

I really like using it. There is even a place to add recipe ingredients to figure out the info. on things you cook at home! THAT I really like! You can use the online version, too, but I like the app better. It keeps up with the sugars.

I have been using the app since the first of the year. So far I have lost 9 pounds! My family has been GREAT encouragement. Chip and I go walking from time to time. The kids ask me to play the Wii dance game with them. Hooray! I am not on the sidelines any more.

So far, I am just trying to stick to the 1200 calories/day. It was hard at first. I’m learning! I am TRYING to stay within the limit of 24 grams of sugar per day. Now THAT is hard for this sugar baby!

I haven’t started any major exercise regimen just yet. I can only handle one major life change at this moment.

Really, I guess this diet has helped me be much more intentional about what I eat. I suppose I shouldn’t look at “diet” as a “4-letter word” any more.

How about you? Did you start the “D” word at the first of the year? What is working for you? Do you have a fabulous low-cal recipe to share? Leave me a comment.

Happy 2013 everyone!

The kids went back to school today. Therefore, life must return to “normal”. Normal, I suppose, includes a blog post! So, we have come to the point in the year, the first post of the year, where I tell you all the stats from last year.

Why? Why do I feel I must do this? Peer pressure? Everyone else is doing it!

If you are a regular around here, none of these posts will be new to you.

However, if you are new, maybe you’ll see something you like and go investigate.

Here goes…

According to the statisticians at WordPress, thank you very much, these are the posts that got the most views in 2012. (Strangely enough, all of the Top 5 are actually from 2011. I guess I can look at that in a couple of different ways…1) Stuff I wrote about in 2012 wasn’t as interesting as 2011 topics, or 2) These posts have staying power–like a little black dress! We’ll go with #2.

#5 Christmas Tree Tour

Bible made from a matchbox and alphabet pasta

Bible made from a matchbox and alphabet pasta

#4 Tie Dyed Fingernails

swirling polish 4

#3 Linguini Salad

Linguini Salad finished

#2 Christmas Party Food

CheeseMan

#1 Dr. Seuss Snacks

proud moment

I had a hard time trying to decide my favorite post of 2012.

I have to say, I was extremely happy to finally finish the Impressionist series. You can see the entire series here. Part X is here.

waiting to go inside

I piggy-backed this post in the BLOGtober series I did with Arkansas Women Bloggers. That was fun too. You can see that series here.

I think my favorite new recipe I tried was Cannellini Beans. Y’all, it is just so good!

spooning beans

Looking back on 2012, we really did a lot! We ate great food, at home and off of trucks! We visited family and friends. We crafted.

My favorite thing we did last year was make a pirate movie with the kids and some of their friends, then hosted the premier for the movie.

The planning, the scrounging, the cooking…it was all good!

table 2

And now, here are the Critics’ favorites.

Critics’ Corner

Chip:

Favorite dish–Pork Chops and Field Peas

ready to serve

Favorite Restaurant–The Bavarian Chef

Schweineschnitzel

Favorite Event–Movie Premier

watching movie

Megan:

Taste–Bud Biscuits

15-hot biscuits

Coolness–Butterfly Cupcakes

completed butterflies

Creative Title–Help! I ate something green!

more kale

Fun–Bocce Ball

bocce ball 1

Gross–Welch’s Fruit FIZZ

box

Katie:

Great Wolf Lodge!

main attraction

Strawberry Delight!

Strawberries outside

Thank you for following my little blog. Whether you are a subscriber to the blog or the Facebook page, get here from Pinterest, or stop by at random, your visits, “likes” and comments are appreciated!

Now I know why people do the “year in review” post…happy memories! I plan on making some more in 2013! I hope you are there to share them with me.

« Previous PageNext Page »